
Want to know more about the step by step guide? Check out this blog to know more
Introduction:
With the increasing focus on renewable energy and the desire to reduce carbon footprints, many homeowners are considering solar panel installation. Going solar not only helps the environment but also offers long-term cost savings. In this blog post, we will provide you with a step-by-step guide to help you navigate the process of installing solar panels on your property.
1. Assess Your Energy Needs:
Before diving into solar panel installation, it's important to assess your energy needs. Evaluate your average monthly electricity consumption and determine how much of that you want to offset with solar power. This will help you determine the size and number of solar panels required for your installation.
2. Conduct a Solar Site Assessment:
Next, conduct a solar site assessment to evaluate the feasibility of solar panel installation on your property. Consider factors such as the orientation and tilt of your roof, shading from nearby trees or buildings, and the available roof space. A professional solar installer can assist you in this assessment.
3. Choose a Reputable Solar Installer:
Selecting a reputable solar installer is crucial for a successful installation. Research local solar companies, read customer reviews, and compare quotes to find a reliable and experienced installer. Look for certifications and licenses to ensure they meet industry standards.
4. Design and Permitting:
Once you've chosen a solar installer, they will work with you to design a solar system that meets your energy needs and complies with local regulations. They will handle the necessary permitting process, including obtaining permits and approvals from your local authorities.
5. Financing Options:
Explore financing options for your solar panel installation. These may include purchasing the system outright, leasing, or entering into a power purchase agreement (PPA). Evaluate the financial implications of each option and choose the one that best suits your budget and goals.
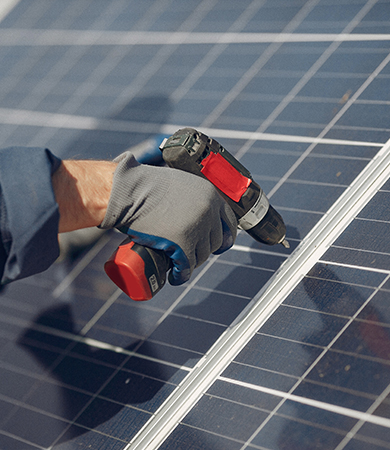
6. Installation Day:
On the installation day, the solar installer will arrive with the necessary equipment and materials. They will mount the solar panels on your roof or ground-mounted system, connect the panels to an inverter, and install the electrical wiring. This process may take a few days, depending on the size of the installation.
7. Inspection and Interconnection:
After the installation is complete, a local inspector will visit your property to ensure the system meets safety and code requirements. Once the inspection is passed, your solar installer will work with your utility company to finalize the interconnection process, allowing you to start generating solar power.
8. Monitoring and Maintenance:
Once your solar panel system is up and running, it's important to monitor its performance regularly. Many systems come with monitoring tools that allow you to track energy production and identify any issues. Additionally, schedule periodic maintenance to ensure optimal performance and longevity of your solar panels.
Conclusion:
Installing solar panels is a significant step towards a sustainable and cost-effective energy solution. By following this step-by-step guide, you can navigate the process of going solar with confidence. Remember to assess your energy needs, choose a reputable installer, and consider financing options that align with your goals. With proper planning, installation, and maintenance, you can enjoy the benefits of clean, renewable energy for years to come.